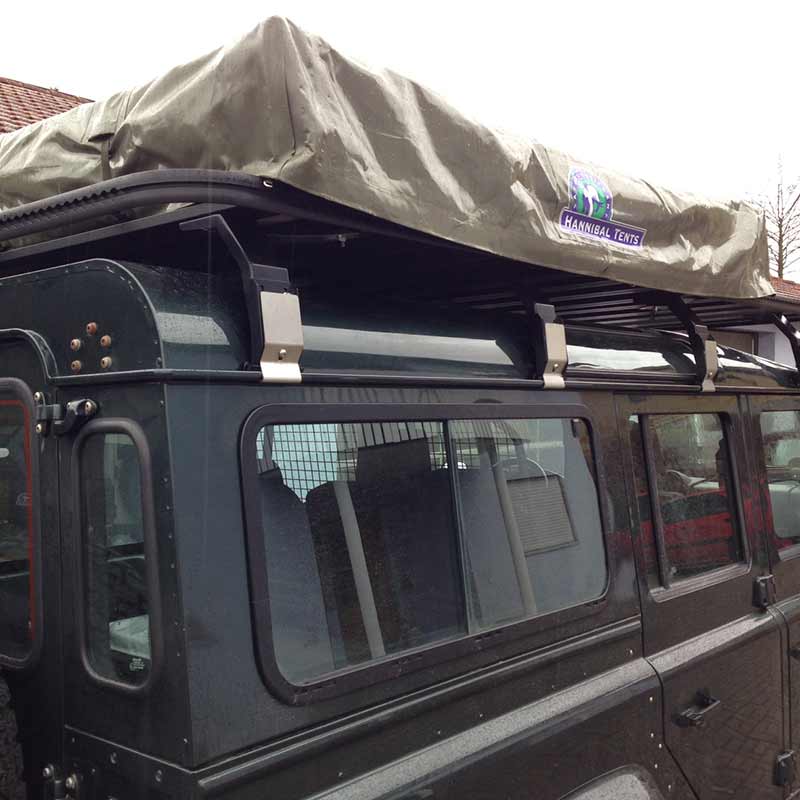
ENGAGE4X4 roof rack with Airline sytsem – Installation instructions
Bill of material fittings (may vary according to roof rack length)
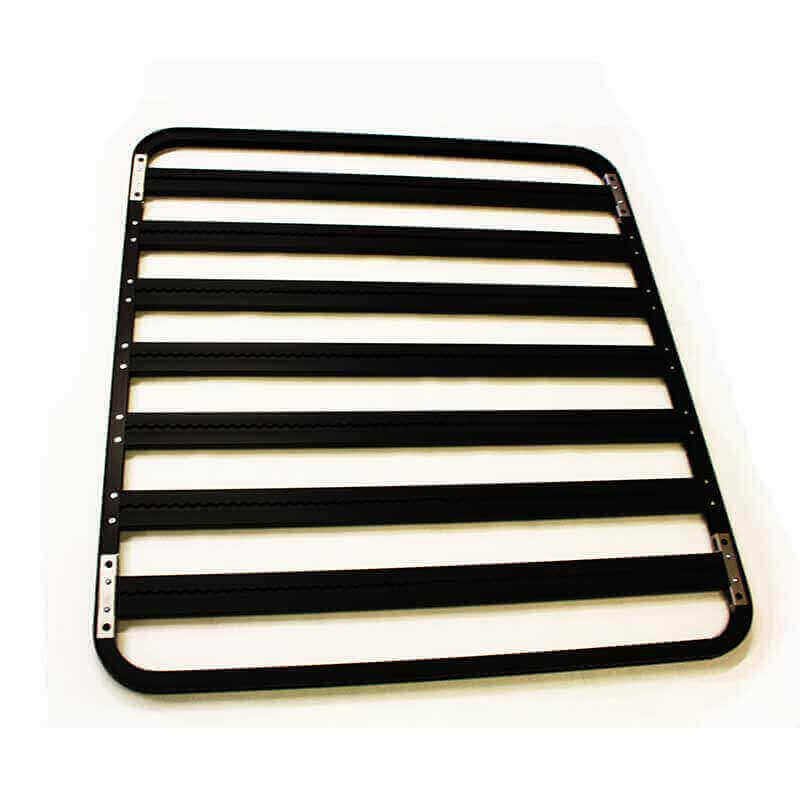
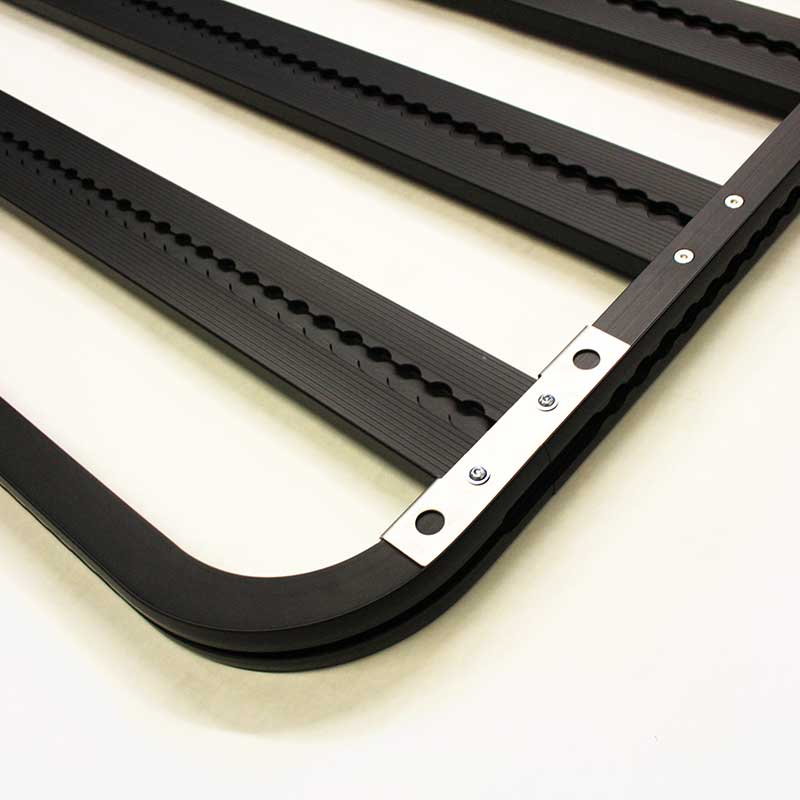
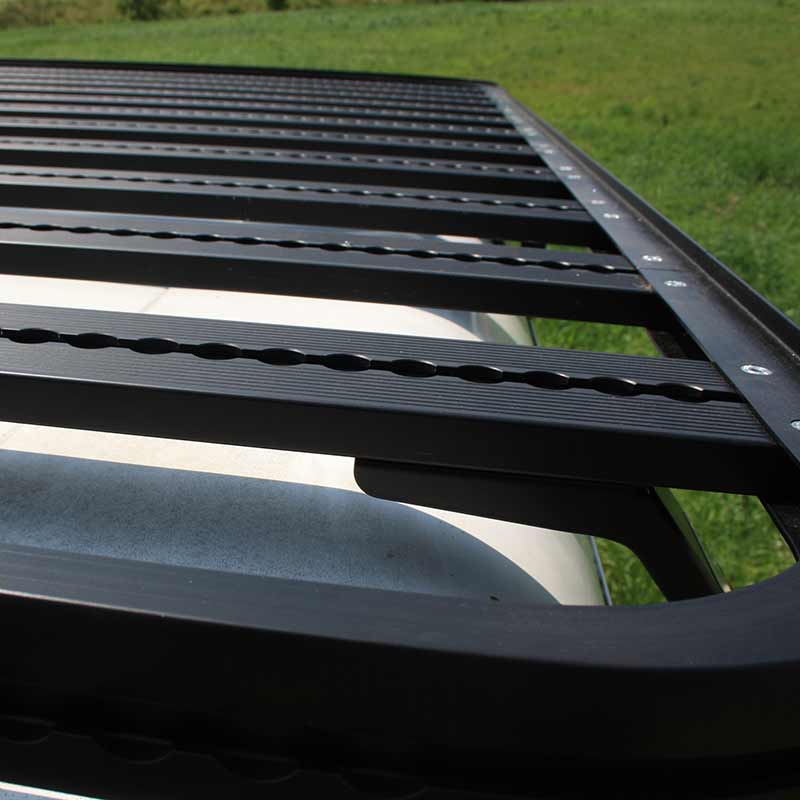
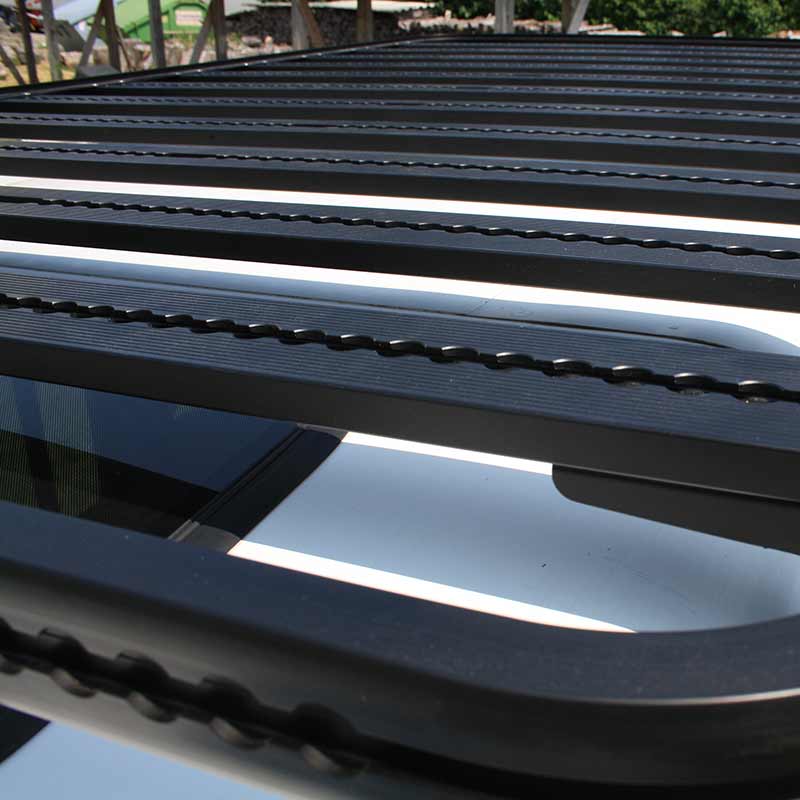
ENGAGE4X4 roof rack parts
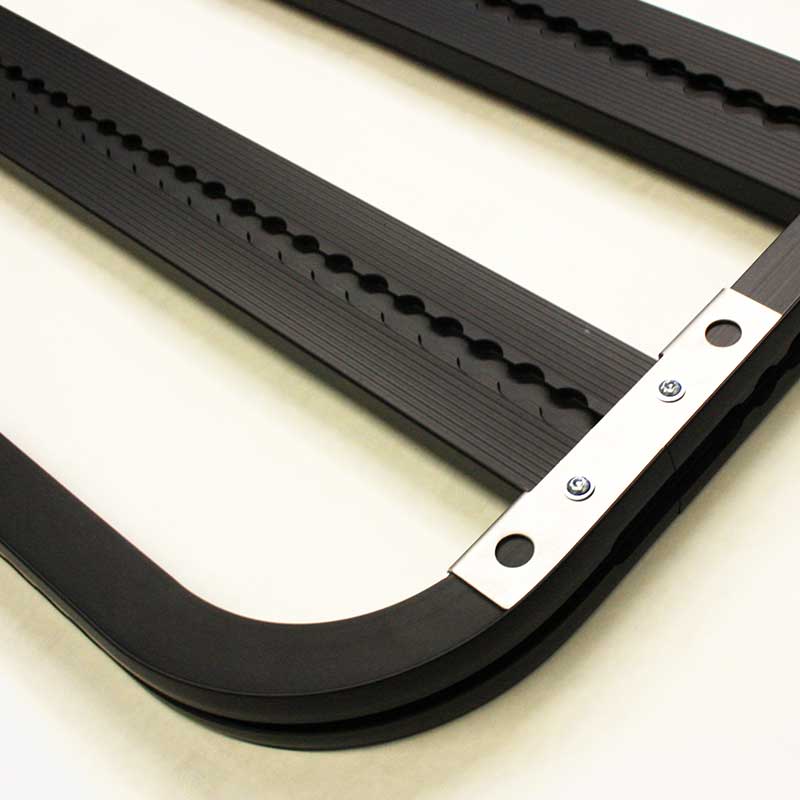
- 2 side sections with 120 mm radius
- 2 side profiles
- 5 to 13 cross braces (depending on roof rack length)
- 4 countersunk screws M6X20 per cross brace
- 4 hoods – V4A
- 8 screws M6X25 pan head (for reinforcing sheet)
- 4 sleeve nuts per cross braces
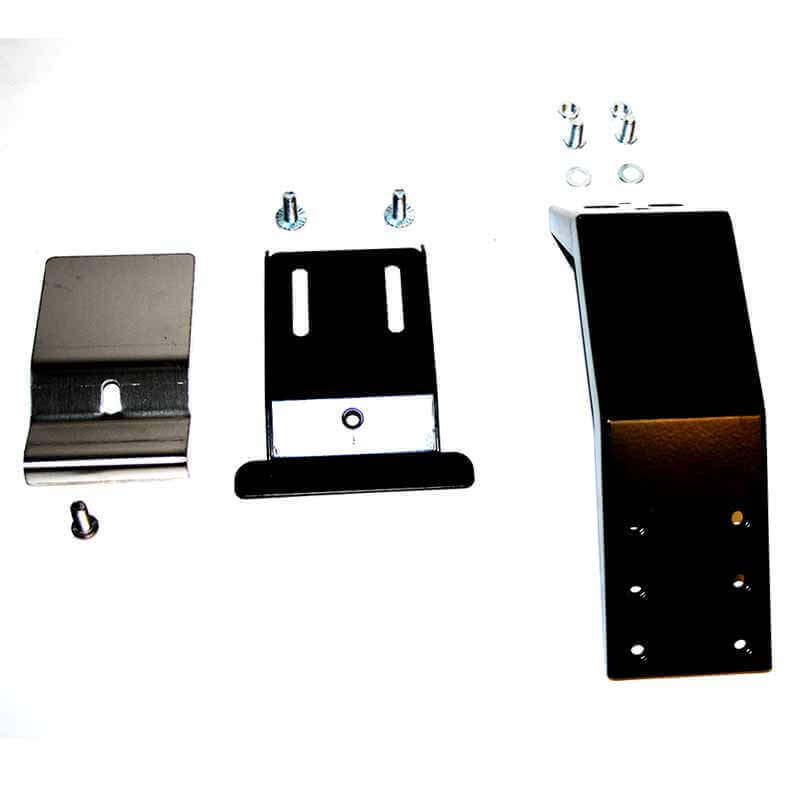
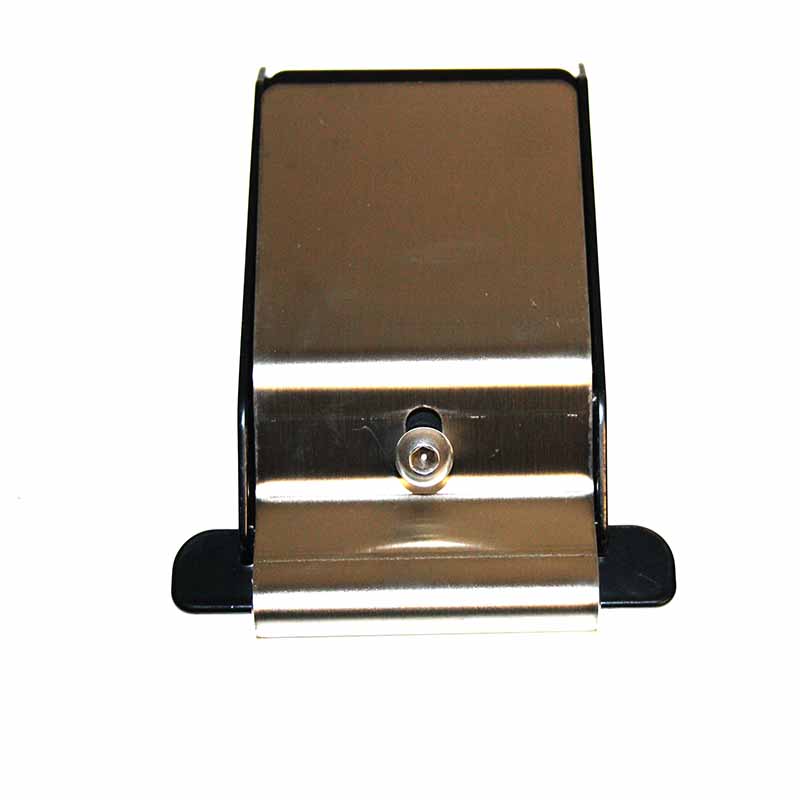
ENGAGE4X4 roof rack feet (vehicle access)
Foot Type : 5V1 to 3 series (height variable)
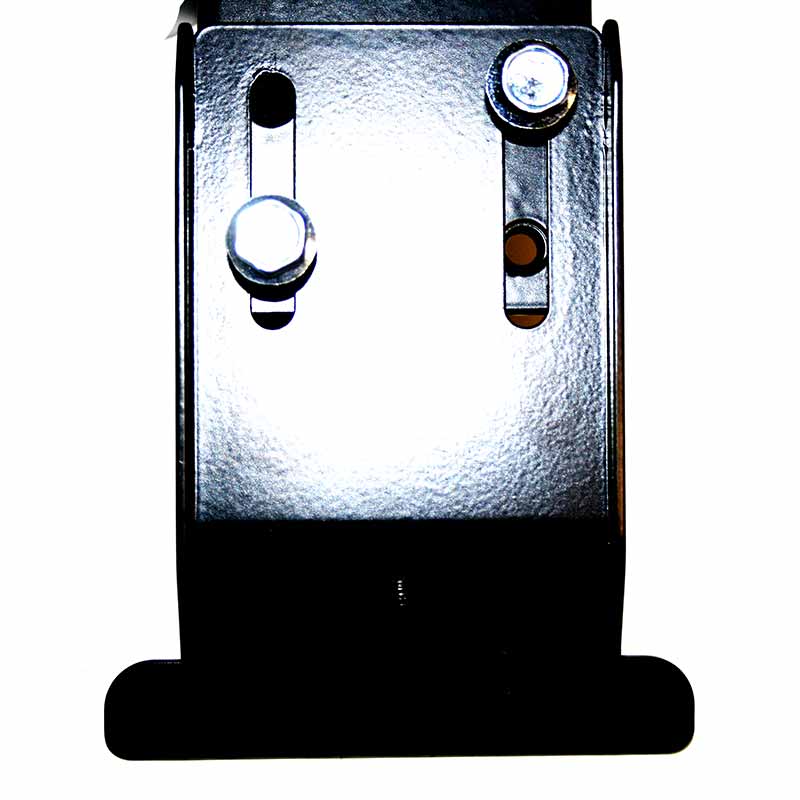
- 1 roof carrier support sheet
- 1 roof rack access channel
- 1 clamping plate roof rack
- 2 screws M8X20 hex with locking teeth (height adjustable connection)
- 2 screws M8X15 hex (leading foot to carrier)
- 2 nuts M8
- 1 screw M8X20 Hexagon socket button head (clamping plate gutter)
Tools
- Allen key 4, 5 and 6 mm
- Plastic hammer
- Wrench 13 mm
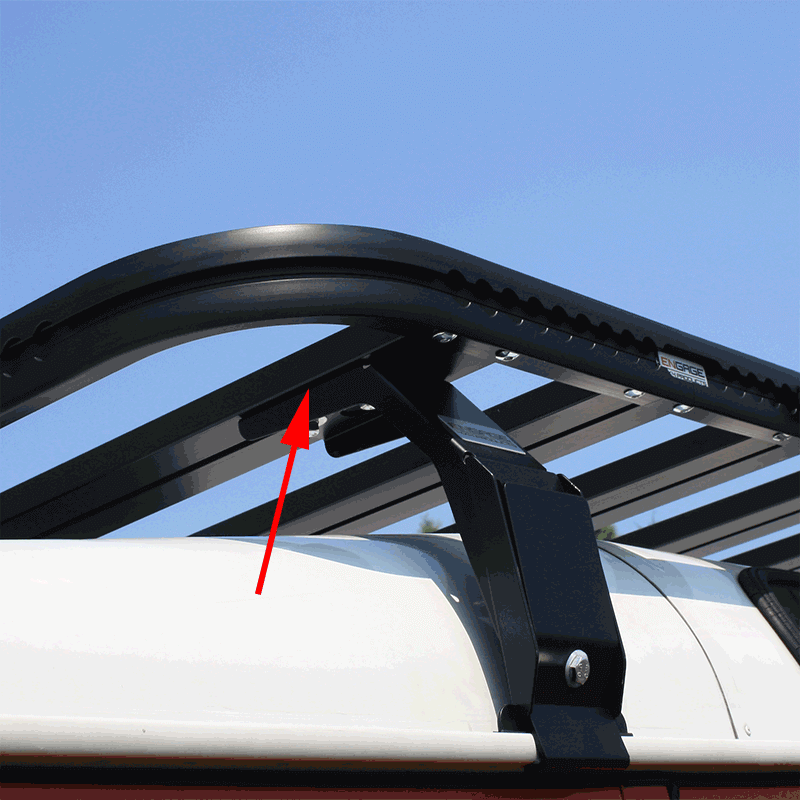
Installation instructions for ENGAGE4X4 roof rack
- Insert the front part and the side parts in the form of the support on a suitable work surface (with a pad to protect from scratches).
- Connect two cross braces to the reinforcement as well as the front and side parts of the roof rack with each other (here the M6X25 pan-head screws are used).
- Now run cross brace for cross brace in the side profiles and position the cross braces with the matching holes in the side profiles.
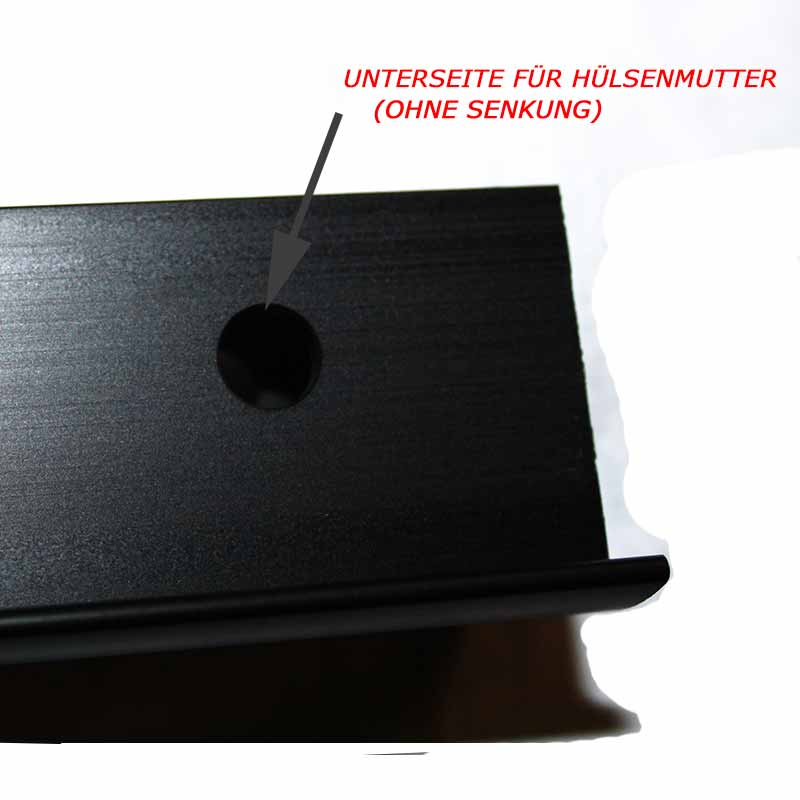
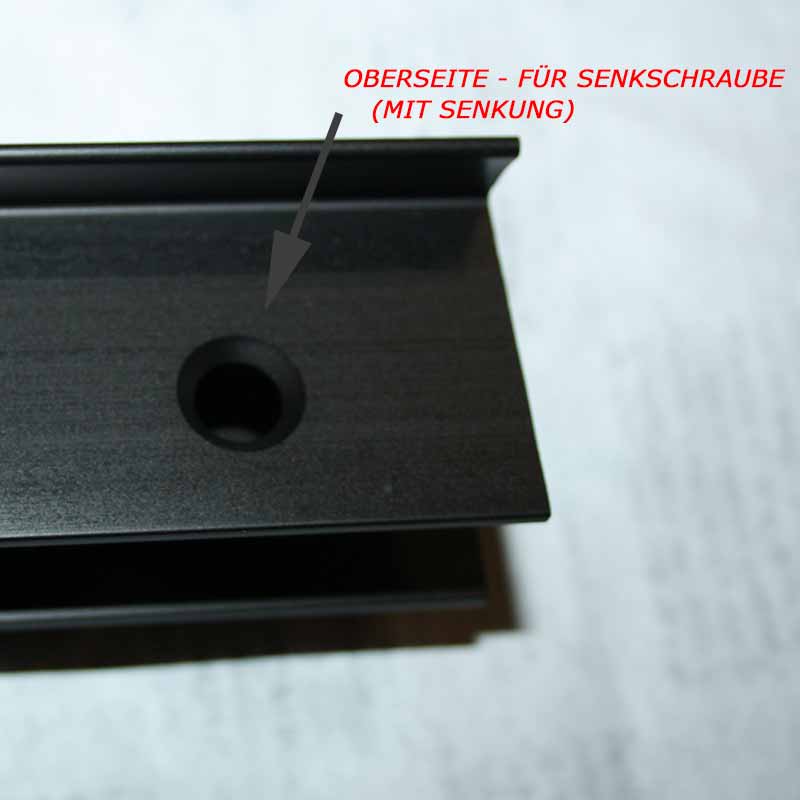
- Now put the sleeve nuts from the bottom and make sure that the side with the reduction is up.
- Then replace gradually all countersunk screws (M6X20) to loose.
- At the reinforcing plates using the eight supplied pan-head screws (M6X25).
The tolerances of the roof rack are very low in order to ensure that the highest stability can.
Tip: To prepare the sleeve nut , you can use a Phillips screwdriver to bring the connecting parts in the correct position.
A montage video of the roof rack can be found here here.
PROJECTS
 ENGAGE4X4 Expeditions-Defender hoch geländegängig18. March 2021 - 11:15
 Rallye Raid Defender Suspension16. March 2016 - 20:09
 Defender Shelter & Flatbed16. March 2016 - 14:44

 Overlanding in Africa 48,000 km with a Defender ENGAGE4X4 Suspension